
Windows 7 SP1, Windows 8.1, Windows 10, Windows 11.
macOS 10.15 and later.
Linux with kernel 2.6.32 or higher and glibc 2.17 or higher.
Source code files and configuration files processed by PC-lint Plus must employ one of the following encodings:
UTF-8
UTF-16
7-bit (non-extended) UTF-8 compatible ASCII text
It is not necessary for all files to use the same encoding, e.g. some files may be encoded as UTF-8 while others are encoded as UTF-16. Files not encoded using one of the above encodings should be converted to UTF-8 before being supplied to PC-lint Plus. There are many tools that can perform such conversion including iconv for Linux and macOS and win-iconv for Windows.
Minimum Requirements
2 GB RAM
x86-64 compatible CPU
Recommended Requirements
2 GB RAM plus 1 GB for every concurrent thread
Multicore x86-64 compatible CPU
Some antivirus software packages employ intrusive mechanisms, such as remote code injection, during their operation. The use of such intrusive mechanisms has the potential to impact the behavior of PC-lint Plus leading to unexpected results. If you experience issues such sluggish performance, application crashes, or inconsistent behavior while using PC-lint Plus in conjuction with such software, you can try running PC-lint Plus with the antivirus software temporarily disabled, with an exception for the PC-lint Plus executable registered with the antivirus software, or on a machine where the antivirus software is not running to help determine if the antivirus software is responsible for the observed behavior.
PC-lint Plus is distributed as a binary executable and may be installed by copying this file to the desired directory.
PC-lint Plus does not require any other installation steps in order to use the product.
If you wish to run PC-lint Plus without specifying the full path of the binary, you will need to either place the PC-lint Plus executable in one of the directories included in your PATH environment variable or add the installed directory to your path.
Verify the change by running echo %PATH% from a newly opened command prompt window.
Note: You may need to have administrative privileges to alter system settings.
Note: This change will not affect already open windows.
Verify the change by running echo $PATH from a newly opened terminal window.
Note: This change will not affect already open terminal windows.
Verify the change by running echo $PATH from a newly opened terminal window.
Note: This change will not affect already open terminal windows.
PC-lint Plus ships with an automated configuration tool named pclp_config.py, which can be found in the
config/ directory of the PC-lint Plus distribution. This Python script simplifies the process of configuring PC-lint
Plus for your compiler and project.
Note: pclp_config is implemented in Python which requires that the Python interpreter as well as the
regex and pyyaml modules to be installed. Installing these dependencies is a simple process described
below.
Note that when using pclp_config.py to generate a compiler configuration, information about the version, size
options, predefined macros, and built-in include directories may not be extractable when invoked in an environment
with a non-English locale. If you encounter a warning about pclp_config.py not being able to extract this
information when using a non-English locale, please contact support.
Installing python The pclp_config program requires Python 2.7 or higher (3.5 or higher is recommended). This section will walk you through the simple process of installing Python per operating system.
Windows
Download and run the latest Python release for Windows.
Linux
Python is probably already installed; try running python –version to check. If it isn’t, you can use a package
manager to install it:
sudo apt-get install python or sudo apt-get install python3 on Ubuntu
sudo yum install python on RedHat or Fedora
You can also install python from source:
Download the python sources, uncompress, and run ./configure && make altinstall.
See Using Python on Unix platforms for more information.
macOS
Python is installed by default on macOS.
FreeBSD
Python is probably already installed; try running python –version to check. If it isn’t, you can install it with the command pkg_add -r python or build it from source.
See Using Python on Unix platforms for more information.
Installing required modules The pclp_config program uses two modules that are not part of the standard python distribution: regex and pyyaml. The easiest way to install python modules is with the pip module. These modules can be installed from the command line as follows:
python -m pip install regex
python -m pip install pyyaml
Recent versions of Python (2.7.9 and up) already contain pip. If pip is not installed, you can install it using:
On macOS: open a terminal window and run: sudo easy_install pip
On other platforms: Download the get-pip.py script and run it from a terminal window with python get-pip.py.
In this section we will work with a simple project and generate the configurations necessary for PC-lint Plus to
process it. The general process is the same for projects of all shapes and sizes. Note that this demonstration is
done while using Linux as an operating system, with tools and compilers commonly available on that
platform.
Our sample project consists of a single source file, hello.c, that contains:
#include <stdio.h>

int main(void) {
   printf("Hello, %s\n", SUBJECT);
   return 0;
}
and a Makefile that describes how the project should be built:
CC = gcc
CFLAGS = -DSUBJECT="\"World"\"

hello.o: hello.c
      $(CC) $(CFLAGS) -c hello.c -o hello.o
hello: hello.o

clean:
   rm hello.o hello
The project is built by running the make utility to compile the program based on the instructions provided in the
make file. In our case we would build by running make hello; running make clean will remove object files and
executables.
Attempting to lint hello.c without any configuration at all (e.g. pclp hello.c) produces the following error:
hello.c  1  error 322: unable to open include file 'stdio.h'
#include <stdio.h>
       ^
The issue is that while your compiler knows where to find your system header files, such as "stdio.h", PC-lint Plus
does not. This information, as well as other details about your compiler such as fundamental type sizes and
predefined macros, needs to be configured before PC-lint Plus can properly analyze your source code. The
process of compiling the necessary information for a particular compiler is referred to as a compiler
configuration.
Section 2.4 Configuring manually discusses the process of manually extracting the various pieces of information to
create a compiler configuration from scratch but in most cases the process can be automated by using pclp_config,
which is what we will do here.
For this example, our compiler is gcc. The first thing we need is the full path of the gcc executable. If we do not
know this, we can run the command whereis gcc or which gcc from a command prompt on Linux or macOS and
where gcc from a command prompt on Windows.
Once we have the location of the compiler, we are ready to generate a compiler configuration using pclp_config.py, using the following command:
python pclp_config.py
   --compiler=gcc
   --compiler-bin=/usr/bin/gcc
   --config-output-lnt-file=co-gcc.lnt
   --config-output-header-file=co-gcc.h
   --generate-compiler-config
pclp_config options start with – and arguments are provided to options by separating them with an
equal sign (=). The first argument tells pclp_config the compiler family we are targeting (gcc); the
–list-compilers option can be used to show all supported compiler families. The second option specifies
the full path of the compiler (/usr/bin/gcc), which pclp_config will use to extract the necessary
information and build a compiler configuration. The next two options instruct pclp_config where to
store the configuration (co-gcc.lnt) and header file (co-gcc.h) it will generate. The names are up
to you but the standard convention is co-COMPILER.lnt and co-COMPILER.h. The last option tells
pclp_config to generate a compiler configuration (as opposed to a project configuration, discussed
later).
Note: In this walkthrough we assume that the compilers.yaml file, the compiler database used by
pclp_config located in the config/ directory of the PC-lint Plus distribution, resides in the same
directory that pclp_config is invoked from. If this is not the case, you will need to add the option
–compiler-database=/path/to/compilers.yaml to each pclp_config command.
Note: If you receive an error about ’utf8’ such as "UnicodeDecodeError: ’utf8’ codec can’t decode" when running
pclp_config from the Windows command line, you may need to change the code page of that session to UTF-8
using the command chcp 65001 before running pclp_config.
Note: If your compiler or development process contains a "developer prompt" or a script that needs to be run to load
appropriate compiler paths or other settings when working from the command line, the commands
discussed in this section should be executed from such a prompt after any such start-up scripts have
run.
Running this command results in a customized co-gcc.lnt file that will look something like this:
/* Compiler configuration for gcc 4.8.4.
  Using the options:
  Generated on 2017-05-15 12:53:06 with pclp_config version 1.0.0.
 */

 ...

// Size Options
-si4 -sl8 -sll8 -ss2 -sw4 -sp8 -sf4 -sd8 -sld16
// Include Options
-i"/usr/lib/gcc/x86_64-linux-gnu/4.8/include"
-i"/usr/local/include"
-i"/usr/lib/gcc/x86_64-linux-gnu/4.8/include-fixed"
-i"/usr/include/x86_64-linux-gnu"
-i"/usr/include"
...
+libh(co-gcc.h)
-header(co-gcc.h)
and a co-gcc.h file that contains macro definitions extracted from the compiler.
Now that we have a compiler configuration, we can add it to our lint command, before our source file (note that we do not reference co-gcc.h directly as a reference to this file, it is automatically included in the generated co-gcc.lnt file):
pclp co-gcc.lnt hello.c
While PC-lint Plus now finds the "stdio.h" header, we encounter a different error:
hello.c  4  error 40: undeclared identifier 'SUBJECT'
   printf("Hello, %s\n", SUBJECT);
                  ^
SUBJECT is a macro that is used, but not defined, in the source code. Since the macro is not a predefined compiler
macro our compiler configuration does not have the definition either. Instead, SUBJECT is a project macro and
demonstrates the need for a project configuration file.
When your build process builds your project, it often adds compiler options that introduce project-specific
macros and include directories as well as other options that affect the behavior of the compiler. In our
case, the build system is make and the Makefile contains a compiler option that defines this macro
(CFLAGS =-DSUBJECT="\"World"\") when the project is built. PC-lint Plus needs this information as
well.
Given a set of compiler invocations used to build a project, pclp_config can generate a project configuration by
interpreting the compiler options present within the invocations and generating a corresponding project
configuration file.
Note: Many build systems (including cmake, Ninja, Meson, and Qbs) support the generation of a JSON
compilation database (compiler_commands.json). When using such a build system, the recommended way to
generate a project configuration is by using this compilation database with pclp_config as described
here . The remainder of this section describes the process of using the imposter program which is
provided to assist in the generation of a project configuration when a compilation database is not
available.
To obtain the compiler invocations, we need to employ a separate tool, the imposter. The imposter program,
provided as imposter.c in the config/ directory of the PC-lint Plus distribution, is a stand-in for the compiler that
logs the options it is called with to a file in a format that can be used by pclp_config to generate a project
configuration.
After compiling imposter.c to imposter with a C compiler, you will need to modify your build process by telling it
to execute the imposter instead of the compiler. Each build system has a different way of doing this, which often
involves setting an environment variable or using a command-line option. See the documentation for your build
system for details or the examples that appear later for details about how to do this on some of the more common
build systems.
In the case of make, the location of the C compiler is typically stored in a variable called CC (CXX is used to store the
location of the C++ compiler to use). The CC variable is defined at the top of our Makefile. We can either edit this
line to point it to our imposter binary or override the CC variable on the command line using make -e
CC=/path/to/imposter hello.
Before we run our modified build though, we need to tell the imposter program where to write its output (the default is stdout). Because imposter is a stand-in for the compiler, it needs to handle all the options that might be provided to it by the build process. For this reason, the imposter uses environment variables instead of options to affect its behavior. The IMPOSTER_LOG environment variable is used to tell imposter where to write invocation data. We could modify the Makefile to set this environment variable before invoking the imposter but we will set it on the command line so we do not have to modify the Makefile. On Linux or macOS this can be done with:
export IMPOSTER_LOG=hello.commands
and on Windows:
set IMPOSTER_LOG=hello.commands
Now we can run make:
make -e CC=/path/to/imposter hello
The file, hello.commands, should now contain the compiler invocations in YAML format, looking something like this:
['-DSUBJECT="World"','-c','hello.c','-o','hello.o']
['hello.o','-o','hello']
We can now use pclp_config to convert this file into a project-specific configuration for PC-lint Plus:
python pclp_config.py
   --compiler=gcc
   --imposter-file=hello.commands
   --config-output-lnt-file=hello.lnt
   --generate-project-config
As before, we need to tell pclp_config what compiler we are using so that it knows how to interpret the options that were logged by the imposter program, which we do with the first option. The second option tells pclp_config where to find the logged invocations. The third option specifies where the project configuration should be written. Like the compiler configuration, this name is up to you but is typically named after the project. Finally, the last option specifies the type of configuration to generate. Running this command will create the necessary project configuration in hello.lnt, which will look like:
-env_push
-dSUBJECT="World"
"hello.c"
-env_pop
This file contains everything that is needed to analyze the project, in this case the macro definition that was missing
before and the name of the source files that constitute the project (just one in this case). The -env_push and
-env_pop options that surround each source file prevent options, such as -d, from extending past the
source files they should be applied to (see -env_push and env_pop for more information about these
options).
We can now analyze the full project using our generated configuration files:
pclp co-gcc.lnt hello.lnt
Note that the compiler configuration comes before the project configuration. Also note that we do not need to
specify the project’s source file on the command line as any source files will be included in the project
configuration.
Both the imposter program and the pclp_config script have a number of configurable options to handle various situations. For example, some projects might not get through the build process without source files being compiled in which case imposter needs to be configured to call the actual compiler after it logs the options it was called with. If you are targeting an architecture that is not your compiler’s default, you will need to provide the architecture options to pclp_config when building the compiler configuration. These details are documented in the 2.3.24 Imposter Options Reference and 2.3.23 pclp_config Options Reference sections.
which gcc
and on Windows with the command:
where gcc
replacing gcc with the name of your compiler.
For STM32CubeIDE users, the location of the compiler can be obtained by following the below steps in the IDE:
python pclp_config.py
   --compiler=gcc
   --compiler-bin=/path/to/compiler
   --config-output-lnt-file=co-gcc.lnt
   --config-output-header-file=co-gcc.h
   --generate-compiler-config
For clang use:
python pclp_config.py
   --compiler=clang
   --compiler-bin=/path/to/compiler
   --config-output-lnt-file=co-clang.lnt
   --config-output-header-file=co-clang.h
   --generate-compiler-config
If the compilers.yaml file (found in the config/ directory of the distribution) is not in the directory from which pclp_config.py is run, you will need to add the option:
--compiler-database=/path/to/compilers.yaml
If you are creating a configuration for a hardware target that is not the compiler’s default, you will need to add the option:
--compiler-options="arch-option"
where arch-option specifies the target architecture, e.g.:
--compiler-options="-m32"
If you use a C or C++ standard language version that is not your compiler’s default, you will also want to add the appropriate -std options using –compiler-c-options and –compiler-cpp-options, e.g.:
--compiler-c-options="-std=c99"
--compiler-cpp-options="-std=c++14"
The generated configuration will be suitable for both C and C++ source files, there is no need to separately configure using g++ or clang++.
In Windows 10:
Press the Windows key to open the Start menu and type "dev".
Select the appropriate "Developer Command Prompt" to launch.
In Windows 8.1:
Press the Windows key to open the Start screen.
Press CTRL + TAB to open the Apps List.
Press V to show available Visual Studio command prompt options.
Select the appropriate "Developer Command Prompt" to launch.
In Windows 8:
Press the Windows key to open the Start screen.
Press Z while holding the Windows key.
Select the "Apps view" icon at the bottom and press V to show the available Visual Studio command prompt options.
Select the appropriate "Developer Command Prompt" to launch.
In Windows 7:
Press the Windows key to open the Start menu, select "All Programs", and then expand "Microsoft Visual Studio".
Select "Visual Studio Command Prompt" from the menu or from the "Visual Studio Tools" menu to launch.
From the Developer Command Prompt opened in step 1, run:
where cl
python pclp_config.py
   --compiler=vs2015
   --compiler-bin=/path/to/compiler
   --config-output-lnt-file=co-vs2015.lnt
   --config-output-header-file=co-vs2015.h
   --generate-compiler-config
replacing vs2015, in all three locations, as appropriate for the version of Visual Studio you are targeting and
/path/to/compiler with the full path of the cl.exe binary located in step 2.
Note that vs2015, vs2017, etc. are for 32-bit targets, use vs2015_64, vs2017_64, etc. for 64-bit
configurations. The –list-compilers option can be used to show all supported values for –compiler.
If the compilers.yaml file (found in the config/ directory of the distribution) is not in the directory from which pclp_config.py is run, you will need to add the option:
--compiler-database=/path/to/compilers.yaml
See 2.3.1.1 Installing Python for steps to install Python if necessary.
When creating a configuration for a project that has changed the “C++ Language Standard” setting, the following option must be added.
--compiler-cpp-options="/std:language-standard"
where language-standard specifies the language standard argument to the compiler option 1 corresponding to the language standard selection, e.g.:
--compiler-cpp-options="/std:c++17"
specifies C++17. The configuration tool makes a reasonable guess for the default language standards in use for the given Visual Studio version. However, if the command to generate a configuration omits language settings, and the assumed default differs from the value in use by the project, then the resulting incomplete configuration may lead to error directives and missing standard library types. 2
A similar option should be provided if C language files are being compiled and use a C language standard that is not the default. 3
--compiler-c-options="/std:c17"
Note: If a project is using the /std:clatest or /std:c++latest options, the equivalent PC-lint Plus -std= option will be set in the generated .lnt based on the latest supported version of Visual Studio. Since these options’ mappings changed between versions and individual releases of Visual Studio, some manual adjustment might be necessary in the generated .lnt file.
The generated configuration will be suitable for both C and C++ source files.
PC-lint Plus supports automated configuration for all IAR compiler families. To generate a compiler
configuration for an IAR compiler using pclp_config, you will need to determine the value to use for the
–compiler option. The table below lists the different compiler families and some of the corresponding
chip-sets.
| Value for | |
| –compiler Option | Description |
|
| |
| iar-430 | IAR compiler for Texas Instruments MSP430 and MSP430X |
| iar-78k | IAR compiler for Renesas 78K0/78K0S and 78K0R |
| iar-8051 | IAR compiler for the 8051 microcontroller family |
| iar-arm | IAR compiler for ARM Cores |
| iar-avr | IAR compiler for Atmel AVR |
| iar-avr32 | IAR compiler for Atmel AVR32 |
| iar-cf | IAR compiler for NXP/Freescale ColdFire |
| iar-cr16c | IAR compiler for National Semiconductor CR16C |
| iar-h8 | IAR compiler for Renesas H8/300H and H8S |
| iar-hcs12 | IAR compiler for NXP/Freescale HCS12 |
| iar-m16c | IAR compiler for Renesas M16C/1X-3X, 5X-6X and R8C Series |
| iar-m32c | IAR compiler for M32C and M16C/8x Series |
| iar-maxq | IAR compiler for Dallas Semiconductor MAXQ |
| iar-r32c | IAR compiler for Renesas R32C/100 microcomputer |
| iar-rh850 | IAR compiler for Renesas RH850 |
| iar-rl78 | IAR compiler for Renesas RL78 |
| iar-rx | IAR compiler for Renesas RX |
| iar-s08 | IAR compiler for NXP/Freescale S08 |
| iar-sam8 | IAR compiler for Samsung SAM8 |
| iar-v850 | IAR compiler for Renesas V850 |
|
|
|
You will also need the full path of the compiler which can be obtained from within the IAR Embedded Workbench
by clicking "Help", "About", "Product Info", then clicking on the "Details" button which should bring up a dialog like
the one shown below:

For example, the following command will create a configuration for the IAR ARM compiler, located in C:\iar\arm\iccarm.exe, with output files named co-iar-arm.lnt and co-iar-arm.h:
python pclp_config.py
   --compiler=iar-arm
   --compiler-bin=C:\iar\arm\iccarm.exe
   --config-output-lnt-file=co-iar-arm.lnt
   --config-output-header-file=co-iar-arm.h
   --compiler-options="..."
--generate-compiler-config
The –compiler-options option specifies the options passed to the IAR compiler when compiling your project, make
sure to replace ... with the options used to compile your project. If you are generating a configuration for
use with C++ source files, make sure to include the option –c++ with –compiler-cpp-options, e.g.
–compiler-cpp-options="–c++".
If the compilers.yaml file (found in the config/ directory of the distribution) is not in the directory from which pclp_config.py is run, you will need to add the option:
--compiler-database=/path/to/compilers.yaml
See 2.3.1.1 Installing Python for steps to install Python if necessary.
The generated configuration will be suitable for both C and C++ source files.
See 2.3.16 Integrating PC-lint Plus with IAR Embedded Workbench for instructions on integrating PC-lint Plus with the IAR IDE.
python pclp_config.py
 --compiler=keil_armcc
 --compiler-bin="C:\Keil_v5\ARM\ARMCC\bin\armcc.exe"
 --config-output-lnt-file=co-keil_cc.lnt
 --config-output-header-file=co-keil_cc.h
 --compiler-c-options="--c99"
 --compiler-options="-c --cpu Cortex-M7 --fpu=SoftVFP"
 --generate-compiler-config
Note: If the configuration files are not placed in the project working directory the option
–header-option-use-enclosing-directory can be added when running pclp_config so that the header file
can be found in the same directory as the options file regardless of where the options file is used.
See 2.3.17 Integrating PC-lint Plus with Keil μVision for instructions on integrating PC-lint Plus with the Keil
IDE.
python pclp_config.py
 --compiler=keil_armclang
 --compiler-bin="C:\Keil_v5\ARM\ARMCLANG\bin\armclang.exe"
 --config-output-lnt-file=co-keil_clang.lnt
 --config-output-header-file=co-keil_clang.h
 --compiler-c-options="-std=c99"
 --compiler-options="-c --target=arm-arm-none-eabi -mcpu=cortex-m7"
 --generate-compiler-config
Note: If the configuration files are not placed in the project working directory the option
–header-option-use-enclosing-directory can be added when running pclp_config so that the header file
can be found in the same directory as the options file regardless of where the options file is used.
See 2.3.17 Integrating PC-lint Plus with Keil μVision for instructions on integrating PC-lint Plus with the Keil
IDE.
Note: If the configuration files are not placed in the project working directory the option
–header-option-use-enclosing-directory can be added when running pclp_config so that the header file
can be found in the same directory as the options file regardless of where the options file is used.
See 2.3.18 Integrating PC-lint Plus with MPLAB X for instructions on integrating PC-lint Plus with the MPLAB
X IDE.
Note: If the configuration files are not placed in the project working directory the option
–header-option-use-enclosing-directory can be added when running pclp_config so that the header file
can be found in the same directory as the options file regardless of where the options file is used.
See 2.3.19 Integrating PC-lint Plus with Eclipse-based IDEs for instructions on integrating PC-lint Plus with
MetaWare IDE.
Note: The configuration command includes a single-quoted string with inner double quotes. The Windows Command Prompt does not recognize single quotes, requiring that they are replaced with double quotes and each inner double quote escaped with a backslash. It is recommended on Windows to instead execute the command using the single quote support available in PowerShell.
Texas Instruments compilers available for use with pclp_config.py:
| Value for –compiler | Description |
|
| |
| ti_cl430 | Texas Instruments cl430 for MSP430 |
| ti_cl2000 | Texas Instruments cl2000 for C2000 |
| ti_cl6x | Texas Instruments cl6x for C6000 |
| ti_armcl | Texas Instruments armcl for ARM |
|
|
|
Note: cl6x vector extensions are not supported.
Note: If the configuration files are not placed in the project working directory the option
–header-option-use-enclosing-directory can be added when running pclp_config so that the header file
can be found in the same directory as the options file regardless of where the options file is used.
See 2.3.19 Integrating PC-lint Plus with Eclipse-based IDEs for instructions on integrating PC-lint Plus with Code
Composer Studio.
PC-lint Plus supports automated configuration for all Green Hills Software (GHS) compiler families. To generate a
compiler configuration for a GHS compiler using pclp_config, you will need to determine the full path of the
compiler driver. One method to determine the path begins by getting the compiler driver’s directory using the GHS
MULTI Launcher. Within the GHS MULTI Launcher, select "Help" and then "About MULTI Launcher..." which
should bring up a dialog like the one shown below:
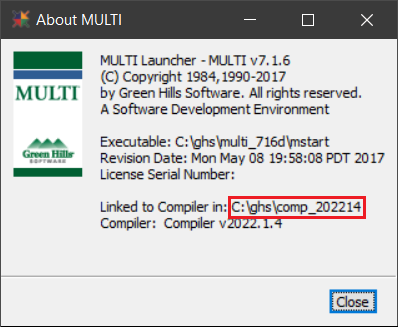
The value of the "Linked to Compiler in:" field indicates the directory where the compiler driver is located. You will
need to examine this directory to determine the name of the compiler driver. The compiler driver typically is named
cc followed by the processor family name. For instance, the ARM compiler is named ccarm (32-bit) or ccarm64
(64-bit). You can find the compiler name for a specific source file by selecting it in the MULTI Project Manager and
consulting the Command pane.
The complete path of the compiler driver is provided to pclp_config as the vaue of the –compiler-bin option. For example, the following command will create a configuration for the GHS ARM 64-bit compiler driver with a full path of "c:\ghs\comp_202214\ccarm64.exe", with output files named co-ghs-arm64.lnt and co-ghs-arm64.h:
python pclp_config.py
   --compiler=ghs
   --compiler-bin=C:\ghs\comp_202214\ccarm64.exe
   --config-output-lnt-file=co-ghs-arm64.lnt
   --config-output-header-file=co-ghs-arm64.h
   --generate-compiler-config
If the compilers.yaml file (found in the config directory of the distribution) is not in the directory from which pclp_config.py is run, you will need to add the option:
--compiler-database=/path/to/compilers.yaml
The generated configuration will be suitable for both C and C++ source files.
NOTE: This tutorial is intended for projects that make use of gcc or SEGGER as their compiler. Other compilers that may be used for a SEGGER project are not currently supported.
Compiler options that affect the parsing step of the compiler, such as macro definitions and include options, should be passed to pclp_config.py by using the –compiler-options option.
python pclp_config.py
 --compiler=cc1
 --compiler-bin="C:\Program Files\SEGGER\SEGGER Embedded
   Studio for ARM 7.32\gcc\arm-none-eabi\bin\cc1"
 --compiler-options="..."
 --config-output-lnt-file=co-segger-cc1.lnt
 --config-output-header-file=co-segger-cc1.h
 --generate-compiler-config
See 2.3.21 Integrating PC-lint Plus with SEGGER IDE for instructions on integrating PC-lint Plus with the SEGGER IDE.
The simplest and easiest way to generate a project configuration is by using the JSON compilation database created by your build system (typically named compile_commands.json). The same pclp_config utility used to generate your compiler configuration can generate a complete project configuration from this file using the following command:
python pclp_config.py
   --compiler=gcc
   --compilation-db=compile_commands.json
   --config-output-lnt-file=project.lnt
   --generate-project-config
replacing gcc with the compiler-family of your compiler and compile_commands.json with the name of your
compilation database. The project may then be analyzed by running PC-lint Plus with the arguments
compiler.lnt project.lnt where compiler.lnt is your compiler configuration.
If your existing build process does not already produce a compilation database, you can instruct it to do so
using the instructions below depending on your build system. If your build system is not capable of
producing a compilation database, you can either use a third-party tool such as Bear to generate one or
use the provided imposter program as described in the following two sections to achieve a similar
result.
Generating a compilation database with cmake
When using Ninja or a Makefile generator, cmake can produce a compilation database by using the option
-DCMAKE_EXPORT_COMPILE_COMMANDS=ON when building.
Generating a compilation database with iarbuild
Recent versions of iarbuild can generate a compilation database using the -jsondb option, e.g.:
iarbuild project.ewp -jsondb config -output compile_commands.json
Where project.ewp is the IAR Embedded Workbench project file and config is the name of the build
configuration (Release, Debug, etc).
Generating a compilation database with Meson
Meson automatically generates compile_commands.json.
Generating a compilation database with Ninja
Ninja can generate a compilation database using the command:
ninja -t compdb > compile_commands.json
since version 1.10. For versions of Ninja between 1.2 and 1.9, a rule name is required, e.g.:
ninja -t compdb rule1 [rule2...] > compile_commands.json
Generating a compilation database with Qbs
The Qbs build system can generate a compilation database with the command:
qbs generate –generator clangdb
Generating a compilation database with SCons
Since version 4.0, SCons can generate a compilation database using the instructions provided here.
export IMPOSTER_LOG=/path/to/imposter-log
The file name is not important. If the file already exists, it should be truncated before continuing as imposter.exe appends entries to this file without truncating it.
make -e CC=/path/to/imposter ...
You may also be able to set the CC or CXX environment variables on the command line before running the build process:
export CC=/path/to/imposter
You may need to build the project from scratch in a new directory for make/cmake to use the new setting.
Note: If your project fails to properly build using imposter as the compiler you may need to have imposter run the compiler during the build process. This can be accomplished by running the following command and then running the build process:
export IMPOSTER_COMPILER=/path/to/compiler
Note: If your project contains C and C++ modules and uses a different compiler for each, using IMPOSTER_COMPILER will not be sufficient since this solution supports only one compiler. In this case, you will need to set IMPOSTER_COMPILER_ARG1 (to any value), such as with the command:
export IMPOSTER_COMPILER_ARG1
And set the CC and CXX variables like so:
export CC="/path/to/imposter /path/to/c-compiler"
export CXX="/path/to/imposter /path/to/c++-compiler"
Setting IMPOSTER_COMPILER_ARG1 will cause imposter to use the first argument it is called with as the compiler to invoke, which allows multiple compilers to be supported in a single build. Note that IMPOSTER_COMPILER must not be set for this to work.
Note: When using CMake it is often necessary to use imposter as the compiler during the project generation step. If the CMake configuration process causes test files to be compiled to assess compiler features you will need to clear IMPOSTER_LOG before running the build process to avoid including them in your project configuration.
python pclp_config.py
   --compiler=gcc
   --imposter-file=/path/to/imposter-log
   --config-output-lnt-file=project.lnt
   --generate-project-config
Replacing gcc with the appropriate compiler name, /path/to/imposter-log with the same value that IMPOSTER_LOG was set to above and project.lnt with the desired value.
PC-lint Plus can now analyze your project by running lint compiler.lnt project.lnt.
Note: It is assumed that you have compiled the imposter.c file provided in the config/ directory of the PC-lint Plus distribution to an executable called imposter.exe.
set IMPOSTER_LOG=/path/to/imposter-log
The file name is not important. If the file already exists, it should be truncated before continuing as imposter.exe appends entries to this file without truncating it.
msbuild project.sln /t:clean
msbuild project.sln /p:CLToolExe=imposter.exe /p:CLToolPath=C:\path\to\imposter
Note that the name without a path is provided to the /p:CLToolExe option and the path, without the file
name, is provided to the /p:CLToolPath option.
Note: If your project fails to properly build using imposter.exe as the compiler you may need to have imposter.exe run the compiler during the build process. This can be accomplished by running the following command and then running the two above commands in the same Developer Command Prompt:
set IMPOSTER_COMPILER=/path/to/cl.exe
python pclp_config.py
   --compiler=vs2015
   --imposter-file=/path/to/imposter-log
   --config-output-lnt-file=project.lnt
   --generate-project-config
Replacing vs2015 with the appropriate compiler name, /path/to/imposter-log with the same value that IMPOSTER_LOG was set to above and project.lnt with the desired value.
PC-lint Plus can now analyze your project by running lint compiler.lnt project.lnt.
By integrating PC-lint Plus with IAR Workbench, you can run PC-lint Plus from within the IDE and click on the locations given in the message text to navigate to the provided location. To integrate PC-lint Plus with IAR Workbench, you will need the env-iar.lnt file (found in the lnt directory in the PC-lint Plus distribution); this setup assumes you have copied the file to the same directory as your IAR compiler configuration files. See 2.3.5 Creating a compiler configuration for IAR Embedded compilers for instructions on creating a compiler configuration for your IAR compiler. The following steps will configure IAR Workbench to run PC-lint Plus:
-u -iconfig-loc env-iar.lnt iar-lint-config $FILE_PATH$
replacing config-loc with the full path of the directory containing your configuration files and iar-lint-config with the name of your compiler configuration file, e.g. co-iar-arm.lnt.
Note: If config-loc contains spaces, you will need to include quotes around the argument, e.g.:
"-iC:\location with spaces\lint"
The result should look something like:

To run PC-lint Plus from within IAR Workbench on the current file, select the newly added entry from the Tools
menu:

To run PC-lint on the full project, follow the above instructions to create a new Tool but for "Menu Text" use
"Analyze Project with PC-lint Plus" and for the Argument, replace $FILE_PATH$ with $PROJ_DIR$\*.c.
If you have a project-specific configuration file, you can add this at the end of the command line in step #4. If
the configuration file contains the list of source files that PC-lint Plus should process, remove the
$FILE_PATH$/$PROJ_DIR$.c portion from the "Argument" in step #5.
Note: The env-iar.lnt file is provided with PC-lint Plus and contains special control characters necessary for proper
formatting in IAR Workbench to make locations referenced in messages "clickable". Making modifications to this file
may break this formatting.
Assigning a keyboard shortcut to easily run PC-lint Plus:
Now you can run PC-lint Plus on a file by pressing the keyboard shortcut assigned.
Adding PC-lint Plus to the "Toolbar":

The result should look something like:

To set up PC-lint Plus within Keil μVision:
To run PC-lint Plus within Keil μVision:
In the "Tools" menu, select "Lint"
In the "Tools" menu, select "Lint All"
PC-lint Plus can be used from within MPLAB X using a plugin provided by Microchip. To install the plugin:
To configure the plugin:
To run PC-lint Plus within MPLAB X using the configured plugin:
Right click a source file in the project list and select "Lint this file"
Right click a project in the project list and select "Lint this Project"
Right click within the code editor for a source file and select "Lint this File"
Note: This plugin was developed by a third party for an older PC-lint product. Some features of the plugin, such as the coding standard menu, use outdated configuration files. If you intend to use a MISRA standard with MPLAB X, use the latest version of the configuration file included with PC-lint Plus. Coding standard configuration files can be added to the configuration file specifed in the "Options" dialog to use them with the plugin.
The following instructions describe how to integrate PC-lint Plus with Eclipse-based IDEs including (but not limited
to) Code Composer Studio, STM32CubeIDE, S32 Design Studio, etc. This integration would highlight messages in
the Console view, show parsed output in the Problems pane, and allow navigation to the message’s location by
clicking on it. Please be aware that a compiler configuration is still necessary as outlined in the corresponding
subsection.
Using the below content create the file eclipse.lnt. This file provides the necessary options for this integration and
will be referenced at a later step.
eclipse.lnt:
   -"format=%f:%l: %t: %t %n: %m" // formatting options
   -width=0                   // no line wrapping
   +flm                      // lock format
   +ffn                      // always emit absolute paths
Define a new error parser to recognize the output of PC-lint Plus:
Note: If the "C/C++" menu isn’t available then select the blue text labeled "Show advanced settings".
Severity  Pattern                                 File Line Description
Error     (.*):(\d+):\s+(error):\s+(.*)                $1  $2    $4
Warning   (.*):(\d+):\s+(warning):\s+(.*)              $1  $2    $4
Info      (.*):(\d+):\s+(info|note|supplemental):\s+(.*)  $1  $2    $4
Adding PC-lint Plus as a build option:
Note: If the "C/C++ Build" menu isn’t available then select the blue text labeled "Show advanced settings".
Note: If the "Use custom build arguments" option isn’t available then uncheck "Enable parallel builds" and keep "Stop on build error" checked.
Note: To analyze a project rather than a single file, add the following instead ${selected_resource_loc}/*.c*. The project directory containing the source files must be selected in the "Project Explorer" pane instead of a source file. This argument can be customized as needed if using a generated project configuration instead.
To run PC-lint Plus within the IDE:
Note: If a variable expansion error occurs when running PC-lint Plus, ensure the target source file was last selected
in the "Project Explorer" and retry.
Note: Depending on the IDE’s default settings, messages in the info category may be filtered out. To display info messages, adjust the filters in the "Problems" view.
The built-in Visual Studio Code “Tasks” feature can be used to integrate PC-lint Plus without using an extension.
This can be used to provide the full output in the “Terminal” window and the issued messages in the “Problems”
window with code underlining, e.g.:

The Visual Studio Code tasks.json file, settings.json file, and a PC-lint Plus configuration that can be used to
integrate PC-lint Plus as a Task are provided below.
Note that you will still need a compiler and project configuration as described in the enclosing subsection.
vscode.lnt:
// See https://go.microsoft.com/fwlink/?LinkId=733558
// for documentation on the tasks.json format

// Options for Visual Studio Code compatibility
-width=0                      // no line wrapping
-h1                          // set the message height to 1
-"format=%f:%l:%C: %t: %t %n: %m" // match compiler message format
+ffn                         // always emit absolute paths
settings.json:
{
"pclp_exe": "C:\\path\\to\\pclp64.exe",
"vscode_lnt": "C:\\path\\to\\vscode.lnt",
"terminal.integrated.scrollback": 3000,
"win_command": "| ForEach-Object { '{0}.{1}' -f ++$i, $_ -replace '\\.:', '.${file}:'}",
"mac_command": "| nl -w1 -s. | sed 's#\\.:#.${file}:#g'",
"linux_command": "| nl -w1 -s. | sed 's#\\.:#.${file}:#g'"
}
tasks.json:
{
"version": "2.0.0",
"tasks": [
   { "icon": {"color": "terminal.ansiWhite","id": "search"},
   "presentation": {
      "reveal": "silent",
      "revealProblems": "always",
      "close": false,
      "clear": true,
      "panel": "dedicated",
      "showReuseMessage": false
   },
   "runOptions": {"reevaluateOnRerun": true},
   "label": "PC-lint Plus",
   "type": "shell",
   "detail": "Analyze current file with PC-lint Plus.",
   "windows":{
      "command": "${config:pclp_exe} ${config:vscode_lnt} '${file}' ${config:win_command}",
      "options": { "shell": { "executable": "powershell" } }
   },
   "osx":{
      "command": "${config:pclp_exe} ${config:vscode_lnt} '${file}' ${config:mac_command}"
   },
   "linux":{
      "command": "${config:pclp_exe} ${config:vscode_lnt} '${file}' ${config:linux_command}"
   },
   "problemMatcher":{
      "owner": "C/C++",
      "fileLocation": [
          "absolute"
      ],
      "severity": "info",
      "source": "ID:",
      "pattern":
      {
"regexp": "^(\\d+).(.*):(\\d+):(\\d+):\\s+(warning|error|info|note|supplemental):\\s+(.*)$",
      "code": 1,
      "file": 2,
      "line": 3,
      "column": 4,
      "severity": 5,
      "message": 6
      }
   }
   }
]}
To add the Task on a user level:
Note: You might need to select "Others" if a dropdown menu appears.
Note: The previous content in the tasks.json can be removed since it shows an example unless you have defined additional tasks in which case PC-lint Plus can be added to the list.
Note: "C:pathtopclp64.exe" and "C:pathtolntvscode.lnt" should be replaced with the PC-lint Plus executable location and the location of the vscode.lnt mentioned above respectively.
Note: This task can be added on a project level by creating a folder named .vscode in the project directory. Inside
the .vscode folder, create two additional files named settings.json and tasks.json with their content being
what is described previously.
To bind a keyboard shortcut to easily run the Task:
[{
   "key": "ctrl+shift+alt+p",
   "command": "workbench.action.tasks.runTask",
   "args": "PC-lint Plus"
}]
This will allow the Task to run by clicking "ctrl+shift+alt+p".
To test the Task, start by opening a test.c file and running the Task by using the keyboard shortcut. Alternatively
the Task can run by following these steps:
To enhance the experience of using this task, the third-party extension Error Lens can be used to better highlight the location of issued messages and automatically display the text of the message.
Note: This tutorial is intended for SEGGER Embedded Studio Version 5.68 or newer.
By integrating PC-lint Plus with SEGGER IDE, you can run PC-lint Plus from within the IDE and click on the locations given in the message text to navigate to the provided location. See 2.3.12 Creating a compiler configuration for SEGGER compilers for instructions on creating a compiler configuration for your SEGGER compiler. The following steps will configure the SEGGER IDE to run PC-lint Plus:
Additionally, the .lnt and .h files generated in 2.3.12 should be placed in a folder called lnt which is subdirectory of the LintDir directory.
<!-- PC-lint Plus - https://pclintplus.com/ --> <item name="Tool.PClintPlus"> <menu>&PC-lint Plus</menu> <text>PC-lint Plus</text> <tip>Use PC-lint Plus to analyze the selected file or folder</tip> <key>Ctrl+L, Ctrl+P</key> <match>*.c;*.cpp</match> <message>Analyzing</message> <commands> "$(LintDir)/$(LintExecutable)" -i"$(LintDir)/lnt" "$(LintDir)/lnt/$(LintConfiguration)" "$(DEFINES)" $(INCLUDES) -u -b +ffn -width(0,4) -h1 "-format_category[info,Info]" "-format_category[supplemental,note: supplemental]" "-format=%f:%l:%C:\s%t:\s%m [-e%n]" "$(InputPath)" </commands> </item>
To run PC-lint Plus on a single file, right click the desired source file, then select "PC-lint Plus".
To run PC-lint Plus on the entire project, right click the desired source directory, then select "PC-lint
Plus".
Alternatively, Ctrl + L + P can be used to run PC-lint Plus. Ensure that you have the desired source file or source
directory highlighted in the Project Explorer before using this hotkey.
PC-lint Plus ships with a GUI utility to automate the steps involved in generating simple compiler and project
configurations for Microsoft Visual Studio. It will generate a batch file that can then be executed to generate a
compiler and project configuration. pclpvscfg.exe can be found in the config/ directory of the PC-lint
Plus distribution. This utility also relies on vswhere.exe which is redistributed with permission from
Microsoft. pclpvscfg.exe must be executed from the same directory as vswhere.exe and pclp_config.py
must be in the same directory as compilers.yaml and imposter.c (as they are in the distribution).
Using pclpvscfg.exe:
Troubleshooting:
If a Python installation could not be detected by the availability of python in your %PATH%, a warning will appear. The batch file that the utility will generate requires python to be available.
If a Python installation was detected but a necessary package could not be detected, a warning will appear indicating either that the package appeared not to be installed or that the installation status could not be determined. Ensure the package is installed before using the batch file that the utility will generate.
If an error appears to have occurred after the end of your build, for example at the linking stage, or if compilation continued after the error, the configuration files may still be ready for use. Only an error which stops the build before all files have been passed to the compiler will interfere with the configuration process.
If you receive an error that "build tools cannot be found" this often means the selected Visual Studio installation path does not match the project or solution.
If the compiler fails to execute or you encounter a build configuration error, ensure that the "64-bit build" checkbox was set correctly.
If your solution was generated by CMake you may need to e.g. copy the "Win32" configuration to "x86" or manually add a configuration option to msbuild in the generated batch file.
If you encounter syntax errors related to the macro _CRT_BEGIN_C_HEADER in Visual Studio standard library headers when running PC-lint Plus with a Visual Studio project configuration then module was likely processed without a Visual Studio compiler configuration. Ensure that the compiler configuration is present as an argument to PC-lint Plus prior to the project configuration.
If you receive an error about ‘utf8’ such as UnicodeDecodeError: ’utf8’ codec can’t decode when running the generated batch file from the Windows command line then you may need to change the code page of that session to UTF-8 using the command chcp 65001 before running the generated batch file.
pclp_config accepts a variety of options that can be used to fine-tune generated configurations and for
troubleshooting purposes. The most common options used with pclp_config are described above, below is a
complete list of options supported by pclp_config. Options that accept arguments can be specified as either
–option=arg or –option arg.
| Option | Description |
||
| –help | Show the help screen. |
||
| –compiler-database | Used to specify the location of the compiler database; compilers.yaml is the default. |
||
| –list-compilers | Dump a list of compilers supported by the compiler database along with a short description of each. |
||
| –compiler | Used to specify the name of a compiler or compiler family from the list of supported compilers. |
||
| –compiler-bin | Used to specify the full path of the compiler binary for operations that need access to the compiler (such as the –generate-compiler-config and –compiler-version operations). |
||
| –compiler-version | Runs the specified compiler and attempts to extract and display version information. Useful for troubleshooting. Emits ’None’ if extraction fails for any reason. Must be used with –compiler and –compiler-bin. |
||
| –generate-compiler-config | Instructs pclp_config to generate a compiler configuration for the specified compiler. Usually used with –compiler and –compiler-bin. |
||
| –generate-project-config | Instructs pclp_config to generate a project configuration. This would be done using compile commands logged from running the build process with the imposter program in place of the compiler or using a JSON compilation database. Used with the –compiler, –imposter-file or –compilation-db, and –config-output-lnt-file options. |
||
| –config-output-lnt-file | Specifies the name of the configuration file to write when generating compiler or project configurations. |
||
| –config-output-header-file | Specifies the name of the compiler configuration header file to generate. |
||
| –imposter-file | Specifies the name of the log file containing compile commands logged by the imposter process. |
||
| –compilation-db | Specifies the name of the JSON compilation database used to generate a project configuration. |
||
| –prefix-directory-options | Specifies additional compiler options for which the argument should be prefixed by the directory entry in a JSON compilation database if the argument is not an absolute path. By default, the options -I, /I, and @ receive this treatment. |
||
| –response-file-prefix | Specifies the string used to introduce the name of a response file within a JSON compilation database. The default value is ’@’, if your compiler uses a different option or prefix to specify a response file, e.g. -f, this option can be used recognize it. |
||
| –posix-command-parsing | Specifies that posix-like parsing behavior should be employed when processing response files, arguments embedded in the command field of a JSON compilation database, and in the application of the –shell-parse-compiler-options option. In particular, backslashes are treated as escape characters and quotes may be used to specify arguments containing spaces. This is the default behavior on Linux and macOS. |
||
| –no-posix-command-parsing | Specifies that non-posix-like parsing behavior should be employed when processing response files, arguments embedded in the command field of a JSON compilation database, and in the application of the –shell-parse-compiler-options option. In particular, backslashes and quotes are treated as literal characters. This is the default behavior on Windows. |
||
| –shell-parse-compiler-options | Specifies that shell-like parsing should be employed when processing arguments to –compiler-options, –compiler-c-options, and –compiler-cpp-options. The –posix-command-parsing and –no-posix-command-parsing options control whether this uses posix-like or non-posix-like parsing. |
||
| –source-pattern | A regular expression used to distinguish source modules from options in the compile commands log generated by the imposter process. The default value is .*\.(c|cpp)$ and matches any string that ends with .c or .cpp. |
||
| –module-include-pattern | A regular expression pattern used to specify which modules will be included in a generated project configuration. This option may be used multiple times to specify multiple patterns, a module that matches any of the provided patterns will be included unless it also matches a pattern specified by –module-exclude-pattern. |
||
| –module-exclude-pattern | A regular expression pattern used to specify modules that should be excluded from a project configuration. This option may be used multiple times to specify multiple patterns. A module matching any of the patterns provided by this option will be excluded from the generated project configuration. |
||
| –compiler-options | A space separated list of base compiler options. If you are targeting an architecture other than the compiler’s default, you should include the option that specifies the target architecture when generating a compiler configuration to ensure the correct values for size options in the generated configuration. Compiler options specified with this option are applied when the compiler is invoked in either C or C++ mode. |
||
| –compiler-c-options | Similar to –compiler-options but only used when invoking the compiler in C mode. Use for C-only language options such as setting the language version. |
||
| –compiler-cpp-options | Similar to –compiler-options but only used when invoking the compiler in C++ mode. Use for C++-only language options such as setting the language version. |
||
| –repl | Start a Read Eval Print Loop where compiler options are read from stdin and transformed PC-lint Plus options are printed to stdout. Requires –compiler. This is a debugging option. |
||
| –scavenge-files | Specifies the list of files to attempt to extract macro names from when performing macro scavenging. |
||
| –scavenge-dirs | Specifies the directories to recurse looking for files to extract macro information from when performing macro scavenging. |
||
| –scavenge-pattern | A regular expression specifying files that should be examined for macro information when using –scavenge-dirs. |
||
| –dont-filter-feature-test-macros | Instructs pclp_config to not filter C++ feature test macros in the generated compiler configuration header file. By default, feature test macros extracted from the compiler which would limited or removed to match the language support in PC-lint Plus. |
||
| –header-option-use- | |||
| enclosing-directory | Use the built-in %ENCLOSING_DIRECTORY% environment variable to provide an ‘absolute’ path for the compiler configuration -header option. |
||
| –debug-dont-show-compiler-errors | When an unexpected condition is encountered, do not show the associated compiler invocation command line, standard input, standard output, and standard error. |
||
| –debug-show-command | Show the compiler invocation command lines. |
||
| –debug-show-input | Show the compiler invocation standard input. |
||
| –debug-show-output | Show the compiler invocation standard output and error. |
||
| –debug-show-trace | Show the internal processing steps. |
||
| –debug-show-tempfile-cleanup | Show debugging messages regarding the cleanup of generated temporary files. |
||
| –debug-show-tempfile-derived | Show debugging messages regarding the tempfile_derived rules. |
||
As previously mentioned, the imposter program uses environment variables to control its behavior instead
of traditional command line arguments. The most commonly used variables are IMPOSTER_LOG and
IMPOSTER_COMPILER although the imposter supports a variety of other options for specific situations. A full list of
options supported is provided below.
| Environment Variable | Description |
||
| IMPOSTER_EXIT_SUCCESS | The value with which the imposter should exit when not invoking a compiler and when no error occurs. This should be the same value your compiler exits with when there is no compilation error or the value your build system expects for a successful compilation. If no success value is supplied, 0 is used. |
||
| IMPOSTER_EXIT_FAILURE | The exit code used when an error is encountered before invoking the compiler. This value is used if the log file cannot be written to, if we run out of memory, or if the compiler fails to invoke. If the compiler is successfully invoked, the imposter returns the value that the compiler returned. If no failure value is supplied, the default of 1 is used. |
||
| IMPOSTER_LOG | The name of the log file to which compiler commands should be written. If an absolute path is not provided, the path is relative the directory in which the imposter is invoked. If no value is provided, output is written to stdout. |
||
| IMPOSTER_COMPILER | The full path of the compiler to invoke after logging invocation information. If no value is provided, no compiler is invoked (unless IMPOSTER_COMPILER_ARG1 is set as described below) and the imposter exits with IMPOSTER_EXIT_SUCCESS on success. |
||
| IMPOSTER_COMPILER_ARG1 | If this variable is set to any value (including an empty value) and IMPOSTER_COMPILER is NOT set, the compiler is expected to be provided as the first argument to the imposter program and will be executed with the remaining argument list. If this variable is set and there is no first argument, the imposter will exit with the failure exit code. This functionality is useful when the imposter needs to stand in for multiple compilers during the build process, such as both a C and C++ compiler. |
||
| IMPOSTER_AUTO_RSP_FILE | If this variable is set, the value is interpreted to be a response file that should be processed and logged to the beginning of the invocation. |
||
| IMPOSTER_NO_RSP_EXPAND | If an argument is received that starts with ’@’, this is treated as a response file and the argument is replaced with the parsed arguments contained within the response file (the name left after removing the ’@’). If the file cannot be opened, or IMPOSTER_NO_RSP_EXPAND is set, the entire argument is logged as is. Note that in all cases, if the compiler is invoked, it receives the unexpanded argument; the expansion is limited to the logging process. |
||
| IMPOSTER_PRE_2008_PARAMS | When parsing response files, the parameters it contains are processed using the Windows command line parameter parsing rules. There is a subtle and undocumented difference between the way handling of consecutive quotes was handled prior to 2008 and after 2008. By default, the post-2008 rules are employed. If this variable is set, the pre-2008 rules are instead employed. |
||
| IMPOSTER_INCLUDE_VARS | A semi-colon separated list of environment variables from which to extract header include information. If this variable is not set, the default list of: INCLUDE;CPATH;C_INCLUDE_PATH;CPLUS_INCLUDE_PATH is used. Each environment variable processed is expected to contain a list of paths, which are emitted as -I options in the log file. The delimiter used and how to change it are described below in IMPOSTER_INCLUDE_DELIM. Environment variables are processed in the order provided. Environment variables included in this list that are not set are ignored. Setting IMPOSTER_INCLUDE_VARS to an empty value will disable this processing. |
||
| IMPOSTER_INCLUDE_DELIM | The character(s) recognized as delimiters when parsing include directories specified from environment variables (such as those specified by IMPOSTER_INCLUDE_VARS). By default, this is ’;’ on Windows and ’:’ on other platforms. Setting this variable will override the default. Each character appearing in the value of this variable will be considered to be a delimiter. For example, setting this variable to ’|!:’ will cause any of these characters to separate directories appearing in the include variables. |
||
| IMPOSTER_MODULES_IN_WORKING_DIR | If this variable is set, the working directory will be preprended to each argument which appears to be the relative path of a module. Apparent options, absolute paths, or arguments lacking one of the extensions defined in IMPOSTER_MODULE_EXTENSIONS will be ignored. |
||
| IMPOSTER_MODULE_EXTENSIONS | If this variable is set, its value replaces the default module extension list: ".c;.C;.cpp;.CPP;.cc;.CC". The value is a case-sensitive list of extensions (including the dot) delimited by semicolons. It is used only to determine what constitutes a module for the purposes of prepending the working directory and will not otherwise affect the configuration process. |
||
| IMPOSTER_PATH_ARGUMENT_RELATIVE_TO | |||
| _WORKING_DIR_OPTION_INTRODUCERS | If this variable is set, any argument that initially matches one of the provided semicolon-delimited strings will have the working directory inserted after the option introducer if the remainder of the option does not appear to be an absolute path. If an option introducer from this list appears as a standalone compiler argument with no appended suffix to insert a working directory before, then the working directory will be inserted before the subsequent argument (if any) unless the next argument is an absolute path or an option. This is intended for options like a -I option where, in e.g. -Irelative/path the working directory needs to be inserted just after -I and in -I path/as/next/arg it needs to be added to the following argument. By contrast, a -Dmacro=value should not have the working directory inserted before the macro name. |
||
Note: PC-lint Plus ships with an automated configuration tool named pclp_config.py, which can be found in the
config/ directory of the PC-lint Plus distribution. This Python script simplifies the process of configuring PC-lint
Plus for your compiler and project. We recommend the use of pclp_config.py over manual configuration for all
compilers supported by pclp_config.py. See section 2.3.2 to get started with pclp_config.py.
Step 1 - Configure Include Directories using the -i option
PC-lint Plus needs to know where the compiler looks for system headers, there are several ways to obtain this information depending on the capabilities of the compiler including:
The preprocessor can be used to emit information about the location of included files. A single-line C source module that just includes a system header (e.g. #include <stdio.h>) can be passed through the compiler in preprocessor only mode in an attempt to obtain the location of the header. The preprocessed output often includes the full paths of included files via #line directives, which can be used to determine the locations of header files. For example, if you are programming on Windows, create a C file called xx.c that contains only #include <stdio.h>.
Then, from a Developer Command Prompt use the command:
cl /P xx.c
The xx.i will contain line directives that will indicate the directory containing stdio.h
If the compiler provides an option to list system include paths, this option can be employed. For gcc and clang based compilers, the options -v -xc -E /dev/null will emit information that includes the system include search path for C headers. For C++ include paths, the corresponding options are g++ -v -xc++ -E /dev/null. For other compilers, consult the compiler’s documentation to determine if such an option exists.
An intentional compile-time error can be introduced in such a way to elicit a message from the standard header, the error message would presumably include the path information. For example, the following program:
#define fprintf @
#include <stdio.h>
produces the following error when processed by clang:
/usr/include/stdio.h:356:12: error: expected identifier or '('
extern int fprintf (FILE *__restrict __stream,
         ^
which includes the full path of stdio.h (/usr/include) in the output.
A filesystem search of the standard library headers can be employed. A search for e.g. stdio.h can be used to determine where the header files reside. The downside of this approach is that if there are several standard library implementations installed, it may not be obvious which one is used by a particular compiler.
Once the list of standard library search paths has been determined using one of the above methods, create a file named lint-includes.lnt containing this list with each directory prepended with -i , for example:
-i/usr/lib/gcc/x86_64-linux-gnu/4.8/include
-i/usr/local/include
-i/usr/include/x86_64-linux-gnu
-i/usr/include
If you have directories that contain space characters, you will need to surround the path with double quote characters, e.g.:
-i"/location of usr/include"
Header files found while searching directories specified by -i options are treated as library by default. If the option +libclass() is used or +libclass(angle) is used and the headers are included without using angle brackets, headers found in these directories will not be considered library. Corresponding +libdir options can be added to lint-includes.lnt to ensure that these directories are treated as library in such cases, e.g.:
+libdir(/usr/lib/gcc/x86_64-linux-gnu/4.8/include)
Step 2 - Extract Predefined Macros
PC-lint Plus needs to know about compiler-defined macros since these will be used by the implementation. Many compilers provide an option to dump such predefined macros to a file. This is by far the easiest way to extract the macros if your compiler supports it.
Method 1 - Extract macros using the compiler
Below is a table that documents the invocation that can be used to dump either C or C++ macros. If
you are using one of these compilers, or a compiler that is a derivative of one of these, you can use the
corresponding invocation to dump the macros. Otherwise, consult your compiler’s documentation for
the equivalent options.
| clang | clang -dM -E -xc /dev/null | clang++ -dM -E -xc++ /dev/null |
| GCC | gcc -dM -E -xc /dev/null | g++ -dM -E -xc++ /dev/null |
| IBM XL | xlc -qshowmacros -E /dev/null | xlc++ -qshowmacros -E /dev/null |
| Solaris Studio | cc -xdumpmacros -E /dev/null | CC -xdumpmacros -E /dev/null |
Method 2 - Extract enumerated macros using the preprocessor
If your compiler does not support dumping pre-defined macros then you will need to create a source file listing pre-defined macro names and compile this file to obtain their values. For example, compiling:
#define S2(x) #x
#define S1(x) S2(x)
#define DV(x) "#define " #x " " S1(x)

#if defined(_MSC_VER)
   #pragma message(DV(_MSC_VER))
#endif

#if defined(_MSC_FULL_VER)
   #pragma message(DV(_MSC_FULL_VER))
#endif
with one version of the cl.exe compiler produces the output:
#define _MSC_VER 1924
#define _MSC_FULL_VER 192428316
By convention, C language macros should be placed into a file named lint_cmac.h, C++ language macros should be placed into a file named lint_cppmac.h.
Step 3 - Establish the sizes of the fundamental types
PC-lint Plus needs to know the size of the basic types (int, short, float, double, pointers, etc.). In this step we’ll create a file called size-options.lnt that contains the sizes of these types. To generate this file, compile and run the following C program using the same compiler and target options used to compile the code that PC-lint Plus will be processing.
#include <stdio.h>
#include <wchar.h>
int main(void) {
   printf("-ss%zu  ",  sizeof(short));
   printf("-si%zu  ",  sizeof(int));
   printf("-sl%zu  ",  sizeof(long));
   printf("-sll%zu ",  sizeof(long long));
   printf("-sf%zu  ",  sizeof(float));
   printf("-sd%zu  ",  sizeof(double));
   printf("-sld%zu ",  sizeof(long double));
   printf("-sp%zu  ",  sizeof(void*));
   printf("-sw%zu\n",  sizeof(wchar_t));
}
Running this program will generate a line that looks something like this:
-ss2 -si4 -sl8 -sll8 -sf4 -sd8 -sld16 -sp8 -sw4
Copy and paste this line, or redirect the output of the program, to a file called size-options.lnt
If you are cross-compiling and cannot execute a binary compiled for the target to obtain this output then you can consult your compiler and target platform documentation for a table of type sizes. Alternatively, type sizes can be obtained through compiler error messages by defining arrays which are illegally of length zero in the presence of a particular type size, e.g. attempting to compile:
int si8[8 != sizeof(int)];
int si4[4 != sizeof(int)];
int si2[2 != sizeof(int)];

int ss8[8 != sizeof(short)];
int ss4[4 != sizeof(short)];
int ss2[2 != sizeof(short)];

int sl8[8 != sizeof(long)];
int sl4[4 != sizeof(long)];
int sl2[2 != sizeof(long)];

int sll8[8 != sizeof(long long)];
int sll4[4 != sizeof(long long)];
int sll2[2 != sizeof(long long)];

int sf8[8 != sizeof(float)];
int sf4[4 != sizeof(float)];
int sf2[2 != sizeof(float)];

int sd8[8 != sizeof(double)];
int sd4[4 != sizeof(double)];
int sd2[2 != sizeof(double)];

int sld8[8 != sizeof(long double)];
int sld4[4 != sizeof(long double)];
int sld2[2 != sizeof(long double)];

int sp8[8 != sizeof(void*)];
int sp4[4 != sizeof(void*)];
int sp2[2 != sizeof(void*)];

int sw8[8 != sizeof(L'a')];
int sw4[4 != sizeof(L'a')];
int sw2[2 != sizeof(L'a')];
should trigger a compiler error on one line out of each group of three lines. The name of each array that triggers
an array of length zero error can be used as a size option after preprending it with a single dash.
Step 4 - Enable compiler-specific extensions
Most compilers implement a number of extensions to the C and C++ languages, such as GCC’s Case Ranges or
Microsoft’s Assembly blocks. Embedded compilers often support additional language extensions. If these extensions
are used by projects that will be processed by PC-lint Plus, they should be enabled in the configuration. Because
there is a wide range of extensions supported by various compilers, we provide flexible compiler adaptation options.
See section 4.12.1 Customization Facilities and section 4.11 Flag Options . Contact support if you run into issues
configuring PC-lint Plus for your compiler.
Putting it all Together
If you have followed the steps outlined above to manually create a configuration for your compiler, you should now have the following:
lint-includes.lnt contains the system include paths.
lint_cmac.h and/or lint_cppmac.h contains C and C++ compiler macro definitions.
size-options.lnt contains options describing the sizes of the fundamental data types.
Your chosen compiler adaptation options.
Now it’s time to put it all together in one place. Create a file named std.lnt with the following contents:
lint-includes.lnt
size-options.lnt
+libh(lint_cmac.h) -header(lint_cmac.h) // and/or lint_cppmac.h as appropriate
// <chosen compiler adaptation options for compiler extensions>