The  AUTOSAR Model Explorer shows the complete AUTOSAR model of a project. The AUTOSAR model of a project consists of the content of the ARXML project files and the AUTOSAR models of all referenced projects (refer to Project Properties). With the AUTOSAR Model Explorer, you can browse and modify the AUTOSAR model.
Open AUTOSAR Model Explorer | <CTRL> + <SHIFT> + <D>, <F> |
Open Editor
To open the AUTOSAR Model Explorer, expand your DaVinci Adaptive project in the DaVinci Project Explorer and double click on  Open Project Dashboard. The Project Frame opens showing the Project Home. You can then open the AUTOSAR Model Explorer as follows:
- Open the
 Editor menu on the top right of the Project Frame and click the AUTOSAR Model Explorer command.
 - Alternatively, use the context menu command Open AUTOSAR Model Explorer of the Open Project Dashboard node in the DaVinci Project Explorer.
- Alternatively, on the Dashboard page of the Project Home, click AUTOSAR Model Explorer in the Generic Editors area.
The AUTOSAR Model Explorer opens in a new tab of the Project Frame.
The Toolbar
Besides the general editor functionalities (see Editor Concept), the toolbar on the top right of the AUTOSAR Model Explorer provides the following features:
- AUTOSAR Packages /
 AUTOSAR Elements: Select whether the AUTOSAR elements are to be displayed in their AUTOSAR package hierarchy or whether they are to be grouped according to their element type, regardless of their location in the hierarchy.
  Horizontal Layout: The horizontal layout is the default layout. All elements of the model are shown in a tree view on the left-hand side. The attributes of the selected element are displayed on the right-hand side.
  Vertical Layout: All elements of the model are shown in a tree view at the top. The attributes of the selected element are displayed on the bottom.
  Filters:
- Hide Elements in Referenced Projects: Hide all elements located in referenced projects. Refer to the section Filter Elements below.
- Show Empty Elements: Displays all elements. Refer to the section Filter Elements below.
- Show Reference Targets: Shows the target of a reference as a child in the tree view. Refer to Referenced Elements below.
- Show Incoming References: Shows the incoming reference of an element in the tree view. Refer to Referenced Elements below.
- Hide Referenced Elements: Hides elements that are referenced, leaving only unreferenced elements visible in the tree view. Refer to Referenced Elements below.
The toolbar on the left side of the AUTOSAR Model Explorer provides the following features:
 Expand: Expands the subtree of the element selected in the AUTOSAR Model Explorer. You can also use the key <Numpad +> to expand the subtree.
 - Expand Next Levels: Click the Expand arrow and select Expand Next Levels to expand the next levels of all collapsed elements displayed in the AUTOSAR Model Explorer. You can also use the key <Numpad *> to expand the next levels.
 Collapse: Collapses the subtree of the element selected in the AUTOSAR Model Explorer. You can also use the key <Numpad -> to collapses the subtree.
 - Collapse All: Click the Collapse arrow and select Collapse All to collapse the entire tree displayed in the AUTOSAR Model Explorer. You can also use the key <Numpad /> to collapse the entire tree.

If you are using Windows with activated Show Reference Targets feature, the key options <Numpad *> and <Numpad /> are not supported and might cause a crash. Therefore, please click the mentioned icons and subcommands instead:
This does not apply if you are using Linux.
Filter Elements
Elements of the AUTOSAR model can be filtered as follows:
- Filter Elements of Referenced Projects:
Per default, all elements including elements from referenced projects are presented in the tree view. Use to reduce the shown elements to only those elements located in the currently opened project. - Filter Empty Elements:
Per default, the tree view is filtered to the elements which are actually present in the model. For most types of elements, a lot of possible children are available which are not actually instantiated. Use to display all potentially possible elements in the tree.
 - Quickfilter:
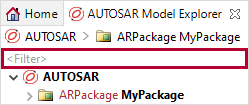
You can filter the entire tree using the quicktype filter above the tree control.
Referenced Elements
The elements in an AUTOSAR model are organized in a tree view. References are used to refer from one element to a different location in the model tree. These references are displayed as hyperlinks and can be opened by clicking on them.
Use  in the toolbar to inline the target of a reference as a child in the tree view. This is useful for visualizing lengthy traversals through the model tree while maintaining the original context.
Use  in the toolbar to inline incoming references.
Use  in the toolbar to filter out elements that are referenced. To better understand how works, it may be worth noting the following:
- In the context of this filter, a model element is considered referenced if it contains at least one incoming reference, anywhere in its corresponding subtree view. It is not required that all subelements in a model element's subtree must be referenced in order for the model element itself to be considered referenced.
- An AUTOSAR package or element group type is filtered out if all non-empty model elements, at the top level, are considered referenced.
Modifying the AUTOSAR Model
The elements of the AUTOSAR model can be modified as follows:
- New Elements
New elements can be created using the Create command in the context menu. For some elements, the generic creation mechanism is not enough. This is especially true when mass operations and/or consistent configuration of multiple references are required (e.g. when creating a deployment for a Service Interface). In these cases, dedicated Wizards and Dialogs are provided in the Create submenu.
 - Move Elements
Use drag and drop to move selected elements to a different parent. - Reorder Elements
Use drag and drop to reorder elements of a package. - Delete Elements
Elements can be deleted from the model using the Delete command in the context menu.
 Deleting an AUTOSAR model element in the AUTOSAR Model Explorer will remove it from the AUTOSAR model entirely. Especially, elements persisted in multiple files are removed from all of these files.
- Modify Element Attributes
Select the element in the tree view of the AUTOSAR Model Explorer. The element attributes can be modified using the controls on the form page.
Scripting Support
Several commands in the context menu of an element are useful for creating automation scripts. These commands generally copy snippets to the clipboard which can then be pasted into an automation script. There are e.g. commands for reading from or writing to the element selected in the tree of the AUTOSAR Model Explorer or for navigating from one element to another element (this last command is especially useful in combination with the [Show Reference Targets] button described in section Referenced Elements above).
The following Scripting commands are available in the AUTOSAR Model Explorer:
 Copy Script Snippet (from here) and
  Copy Script Snippet (to here)
Use the context menu command Scripting|Copy Script Snippet (from here) of an element followed by the context menu command Scripting|Copy Script Snippet (to here) of another element to copy an automation API script snippet to the clipboard which can then be used to traverse from the source to the target element.- The Copy Script Snippet (to here) command is only available for the children in the tree view of the element on which the Copy Script Snippet (from here) command has previously been performed.

Using the context menu command Scripting|Copy Script Snippet (from here) of the selected ParentElement and the command Scripting|Copy Script Snippet (to here) of the selected ChildElement of ParentElement generates the following script:
def fromParentElement = mdfModel('AsrObjectLink')[0]def toChildElement = fromParentElement.ChildElement Copy Script Snippet (read access)
Use the context menu command Scripting|Copy Script Snippet (read access) of an element to copy an automation API script snippet to the clipboard which can then be used to open the generic read-access API on the selected element.Using the context menu command Scripting|Copy Script Snippet (read access) of the selected element generates the following script snippet:
def metaClassName = mdfModel('AsrObjectLink')println metaClassName.attribute- Copy Script Snippet (write access)
Use the context menu command Scripting|Copy Script Snippet (write access) of an element to copy an automation API script snippet to the clipboard which can then be used to open the generic write-access API on the selected element.
Using the context menu command Scripting|Copy Script Snippet (write access) of the selected element generates the following script.transaction{}
def defValue = mdfModel('AsrObjectLink')[0]
//defValue.setValue('<value>');
Copy Commands
The following Copy commands are available in the AUTOSAR Model Explorer:
 Copy Model Element
Use the context menu command Copy|Copy Model Element of an element to copy the complete element to the clipboard which can then be pasted at another location via the context menu command Paste. Note that the Paste command is available only on model elements that can contain the copied element.
 - Copy Name
Use the context menu command Copy|Copy Name of an element to copy the shortname of the element to the clipboard, if available. - Copy Short Name Path
Use the context menu command Copy|Copy Short Name Path of an element to copy the path from the AUTOSAR root to the element to the clipboard. - Copy Instance Specifier
Use the context menu command Copy|Copy Instance Specifier of a Port Prototype to copy the path of the Port Prototype Instance Specifier to the clipboard which can then be used e.g. for the Service Instance to Port Prototype Mapping. - Copy Tree Path
Use the context menu command Copy|Copy Tree Path to copy the path from the AUTOSAR root to the selected element to the clipboard. This can be used e.g. for elements that do not have a short name and for which the Copy Short Name Path option is therefore not available.