Generate the vVIRTUALtarget Solution
Once validation and code generation of the configuration project succeed, build the virtual ECU solution in vVIRTUALtarget or via VttMake.
-
Successful validation and code generation of the configuration project.
-
Open the project’s vVIRTUALtarget project file in the vVIRTUALtarget tool. If the project file has the extension
.vttmake, vVIRTUALtarget uses VttMake instead.VttMake is a separate application, included in the vVIRTUALtarget installation, that lets you define and create a virtual ECU without a GUI—for example, for a CI environment.
-
On the Build tab, generate the solution.
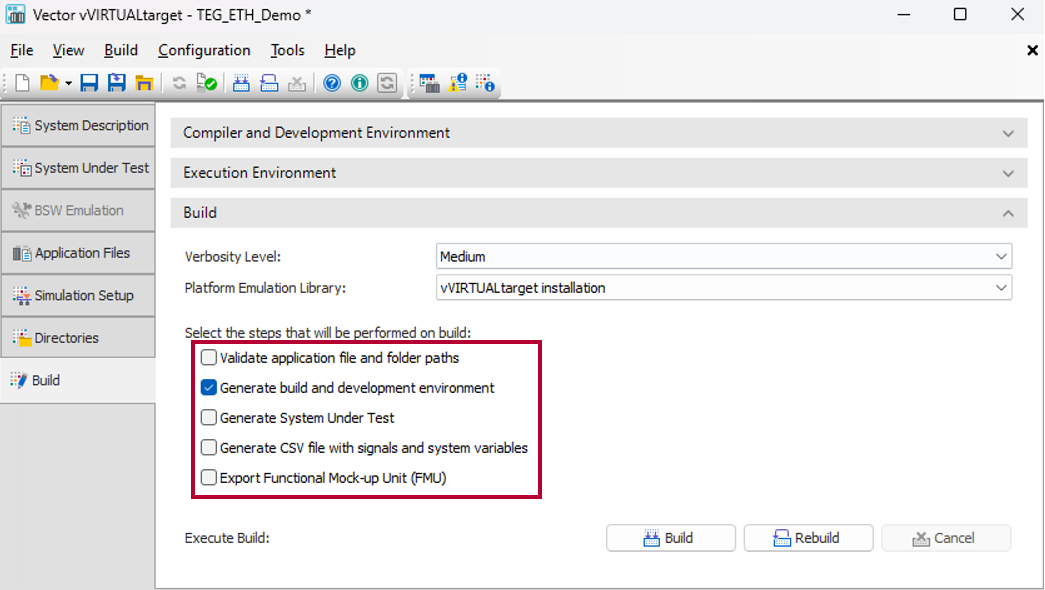 Figure 1. Available Build Steps of vVIRTUALtarget
-
Select Generate System Under Test to compile and link the generated solution without opening the IDE.
-
Deselect this option and click Open IDE to open the solution in an IDE and start the build process manually. We recommend this approach for analyzing compiler problems.
-
|
After each successful build, vVIRTUALtarget automatically copies the virtual ECU to a System Under Test (SUT) subfolder of your project. You can configure this directory in the Directories tab. |
Generated Files and Entry Point
vVIRTUALtarget generates the following files and automatically adds them to the solution:
-
VttPlatformEmu.rc
This resource file provides version information for the DLL. -
VttPlatformEmu_cfg.c
This source file provides handler functions for the runtime library. -
Vtt_Hook.candVtt_Hook.h
These files provide hook and handler functions for vVIRTUALtarget.
You can configure the main entry point in VTTCntrl in
DaVinci Configurator Classic. The default entry point is main(), which the
integrator must implement. In the simplest case, it looks as follows:
void main(void)
{
  EcuM_Init();
}
Alternatively, you can configure any other void/void function. If you don’t need to run user-specific code before starting the MICROSAR stack, you can set the entry point to EcuM_Init, and no user implementation is necessary.